How To List Your Business On Google | Google Business Profile Setup
Creating a Google Business Profile listing for your business is a great way to build credibility and to make it easier for searchers to find your business. This tutorial will teach you how to set up your Google Business Profile.
Set Up Your Google Business Profile Today!
This step by step guide to get your business listed on Google. This will make it easier for searchers to discover your business. It will also make it easier for searchers to contact you, receive directions, and visit your website.
The Tutorial
We have put together both a written and recorded tutorial detailing the necessary steps to set up a Google Business Profile. Follow whichever tutorial suits you best.
Step #1: Visit Google Business Profile
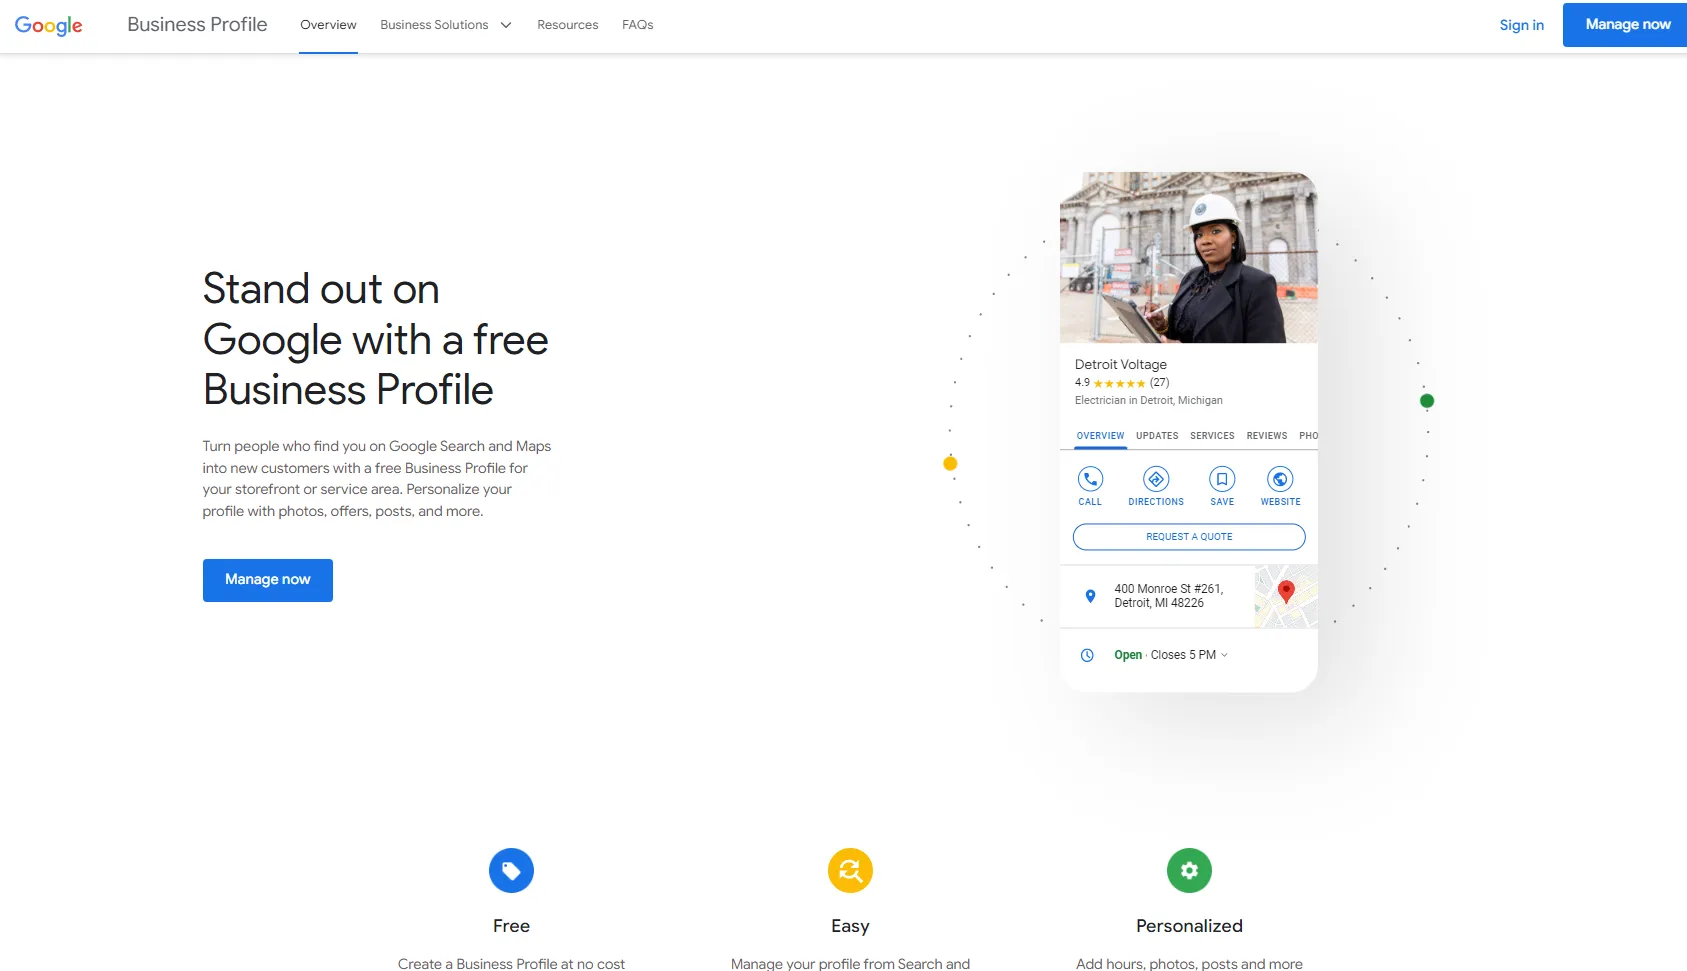
Begin by heading to the Google Business Profile page. You will see a website that looks similar to the one below. Click the button that says “Manage now”.
Step #2: Sign In To Your Google Account
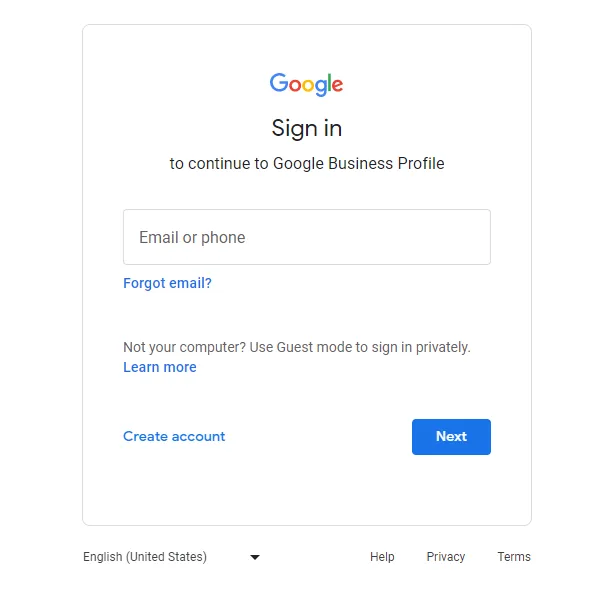
If you have a Google account that you would like to tie to your business profile then sign in. If you don’t have a Google account, then click the button that says “Create account”. Follow the prompts to create a Google account.
Step #3: Enter Your Business’s Name

Begin typing your business’s name as advertised. Depending on your location and if Google knows that your business exists, your business may appear in the dropdown to select. If your business does already appear, select it. If not, no worries, finish typing your business’s name. Once you are set click “Continue”.
Step #4: Select Your Business Type
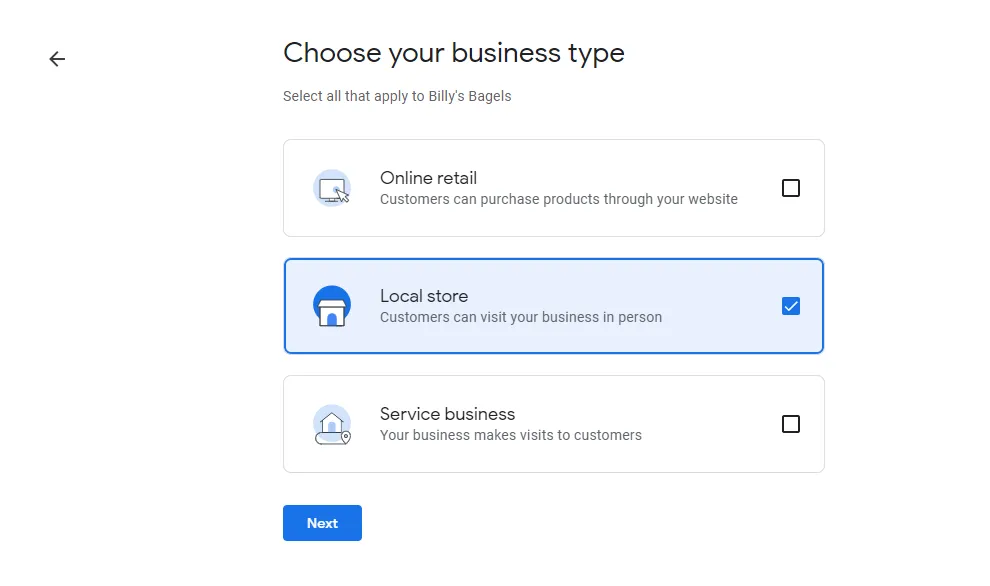
There are three options Google gives you when selecting your business type. Let’s review what they are:
- Online Retail: For businesses with no physical location. Only an online footprint.
- Local Store: Businesses in a traditional sense with a physical location that customers can visit.
- Service Business: Businesses that travel to the locations of their customers to perform their services.
Click the one that best describes your business. If you have a physical location we would recommend that you select “Local Store”.
Step #5: Select Your Business Category
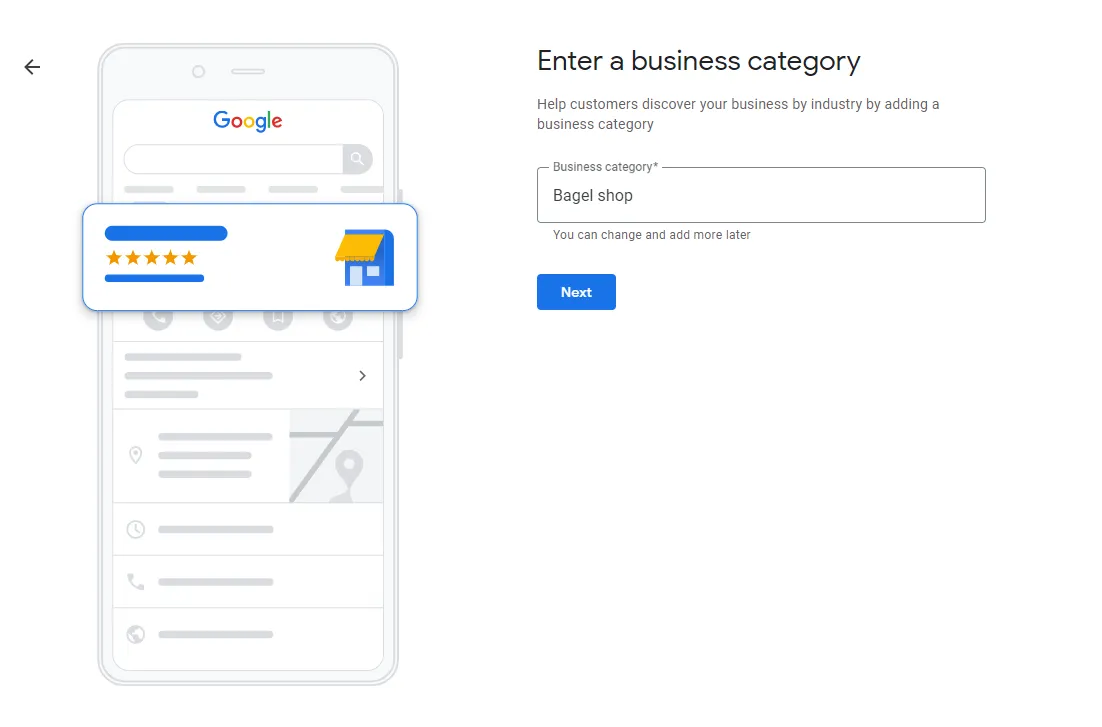
Begin typing the category that your business falls into. As you type Google will pull up recommendations. Select the category that best describes your business. For example, you might search bagel shop if you sold bagels.
Step #6: Enter Your Business Address
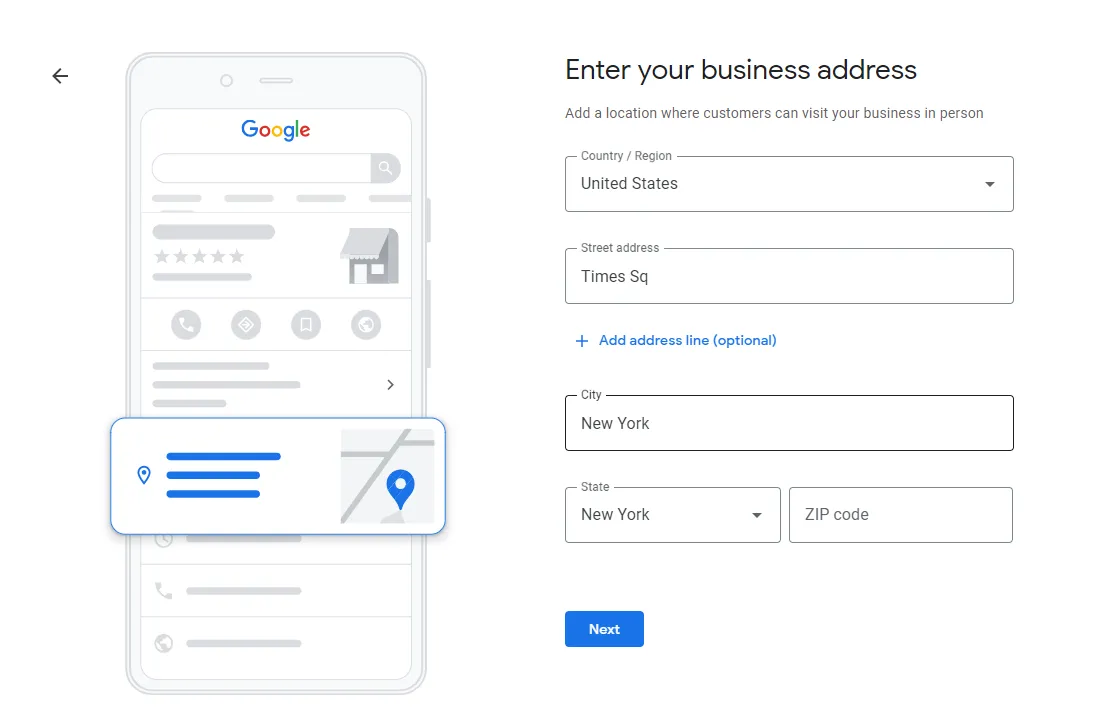
Enter the address to your business and press “next”.
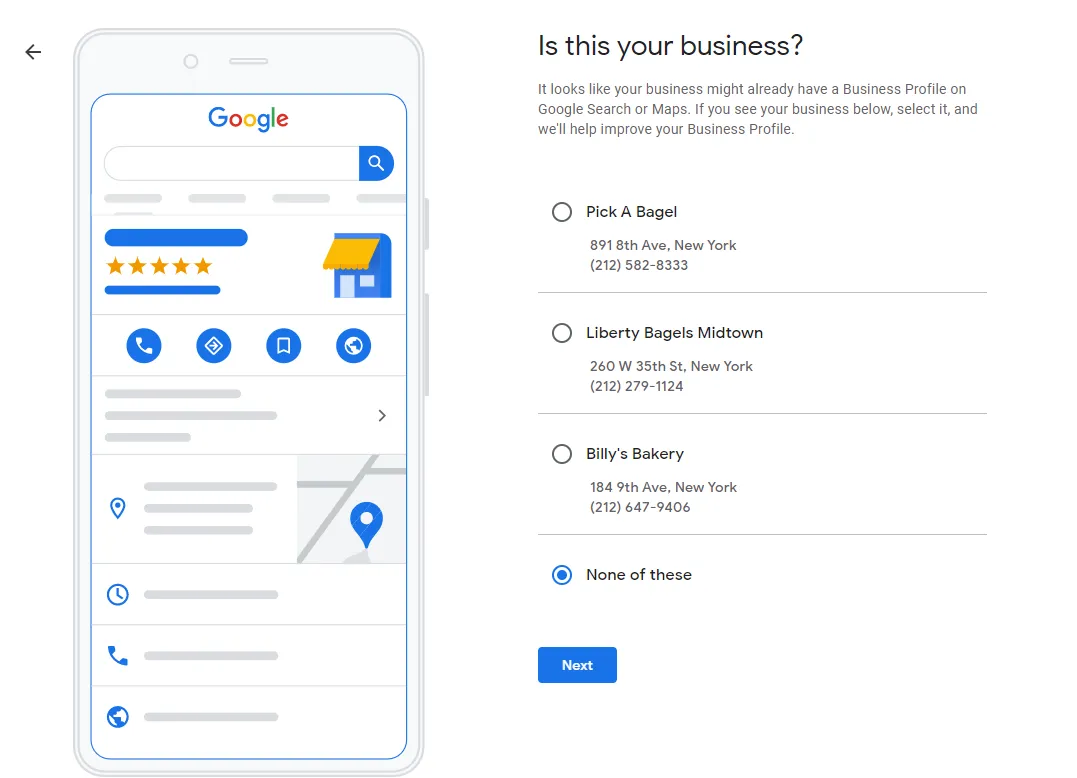
If Google already knows that a business exists at the address you entered then it will ask you “Is this your business?”. If you see your business in the list of businesses then select it, otherwise select “None of these” and press “Next”.
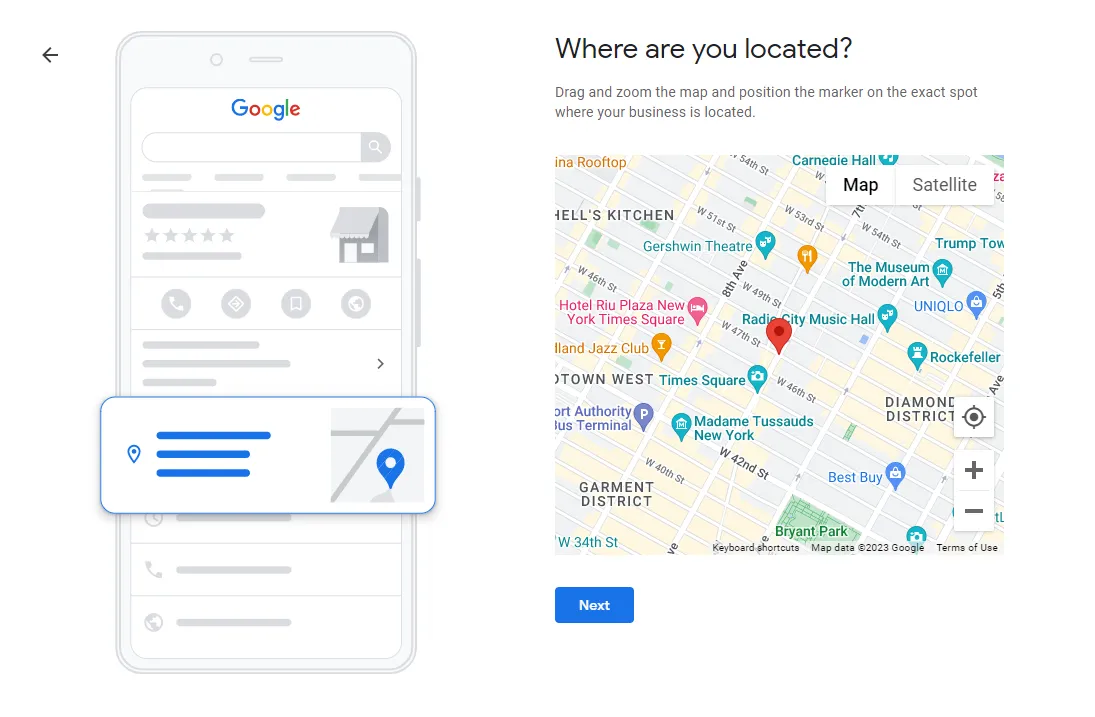
Additionally, you may be asked to specify where you are located on a map. Most of the time you won’t need to do this step. When there is a high concentration of businesses Google will ask you to complete this step. Drag the marker over your position and press “Next”.
Step #7: Enter Your Contact Information

Enter the phone number that you would like to share with Google. Make sure that this is a number you are comfortable publishing to the internet. If you have a website then make sure to enter the website address as well. Then press “Next”.
Step #8: Put Your Business On The Map
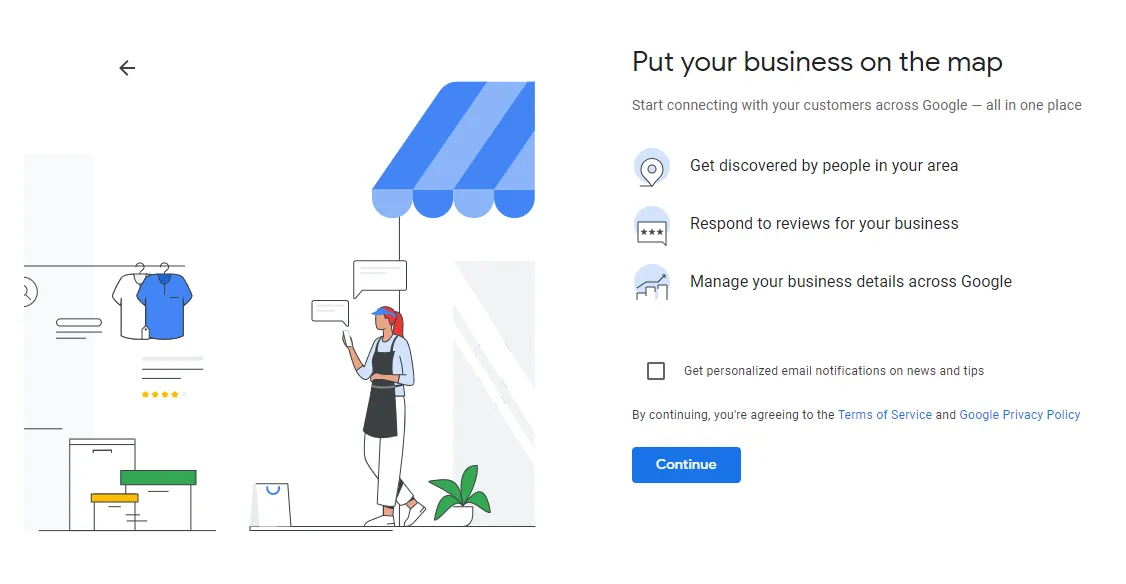
This is a very important step! When you complete your Google Business Profile, Google will place your business on its map. This will help local customers to find you and receive directions.
Step #9: Select Verification Method And Verify Your Account
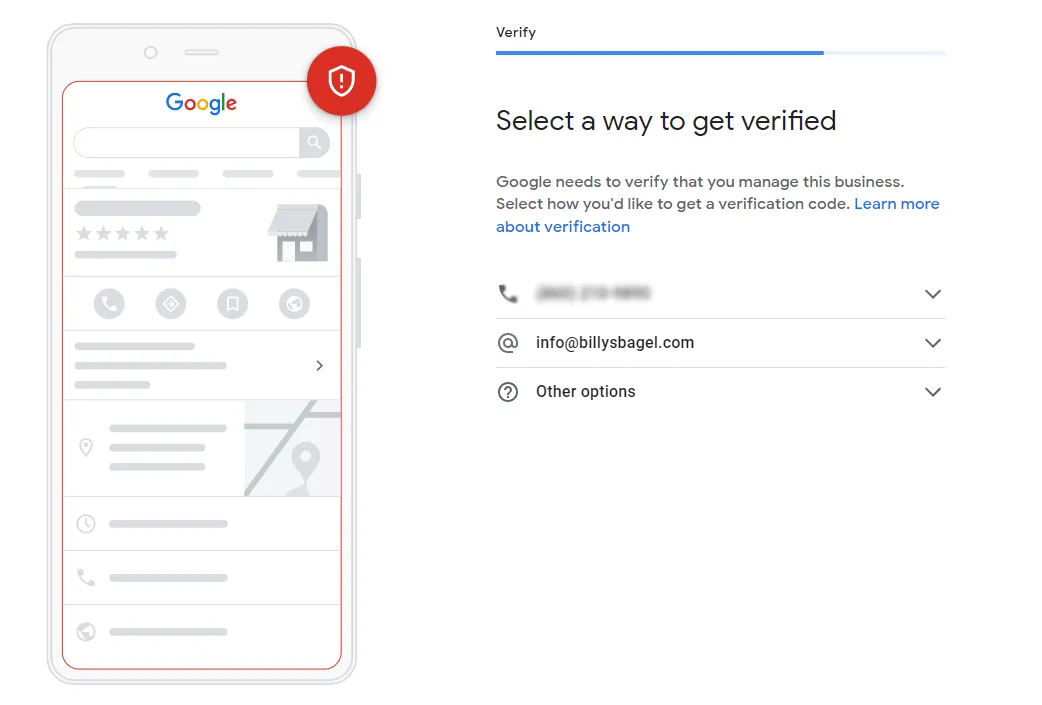
Before Google will publish your business listing it will ask you to verify your business. This is to make sure that you are the owner of the business. Google will ask you to select the way you want to verify your profile.
Let’s review the different verification options:
- Phone code: Google will send you a code to the number that you entered a few steps back. The code may come as a text or a voice call.
- Email code: Google will send your code to your business email. The email will have to share the same address of your website. For example, if your website is www.simply-sprout.com then you must have a business email like [email protected] (the @simply-sprout.com is the important part).
- Physically mail the code: In some cases Google will mail you a letter with the code on it. If you select this method keep an eye on your mailbox as it will arrive in the mail in a few days.
Select the option that is most convenient for you. Sometimes you may have options, other times you may not have a choice and be forced to verify in a specific manner. Click “Next”.
Important Note: No one from Google will ask you for your password. They will only ask you for a verification code. Don’t ever share your password, it is likely a scam.
Step #10: Add Business Hours
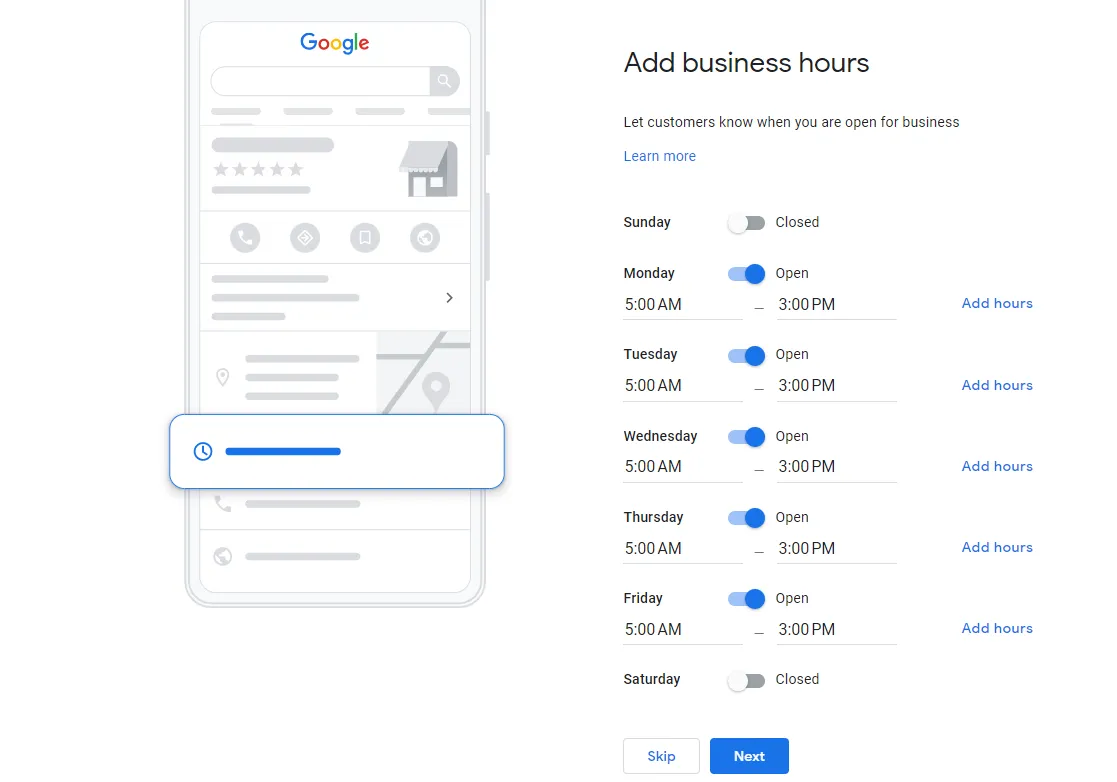
It will be important to share the hours that your business operates. Click the radio buttons on to signify that your work is open that day. Click them closed if you are not. On days that you work you can set your hours. Once you have your hours set click “Next”.
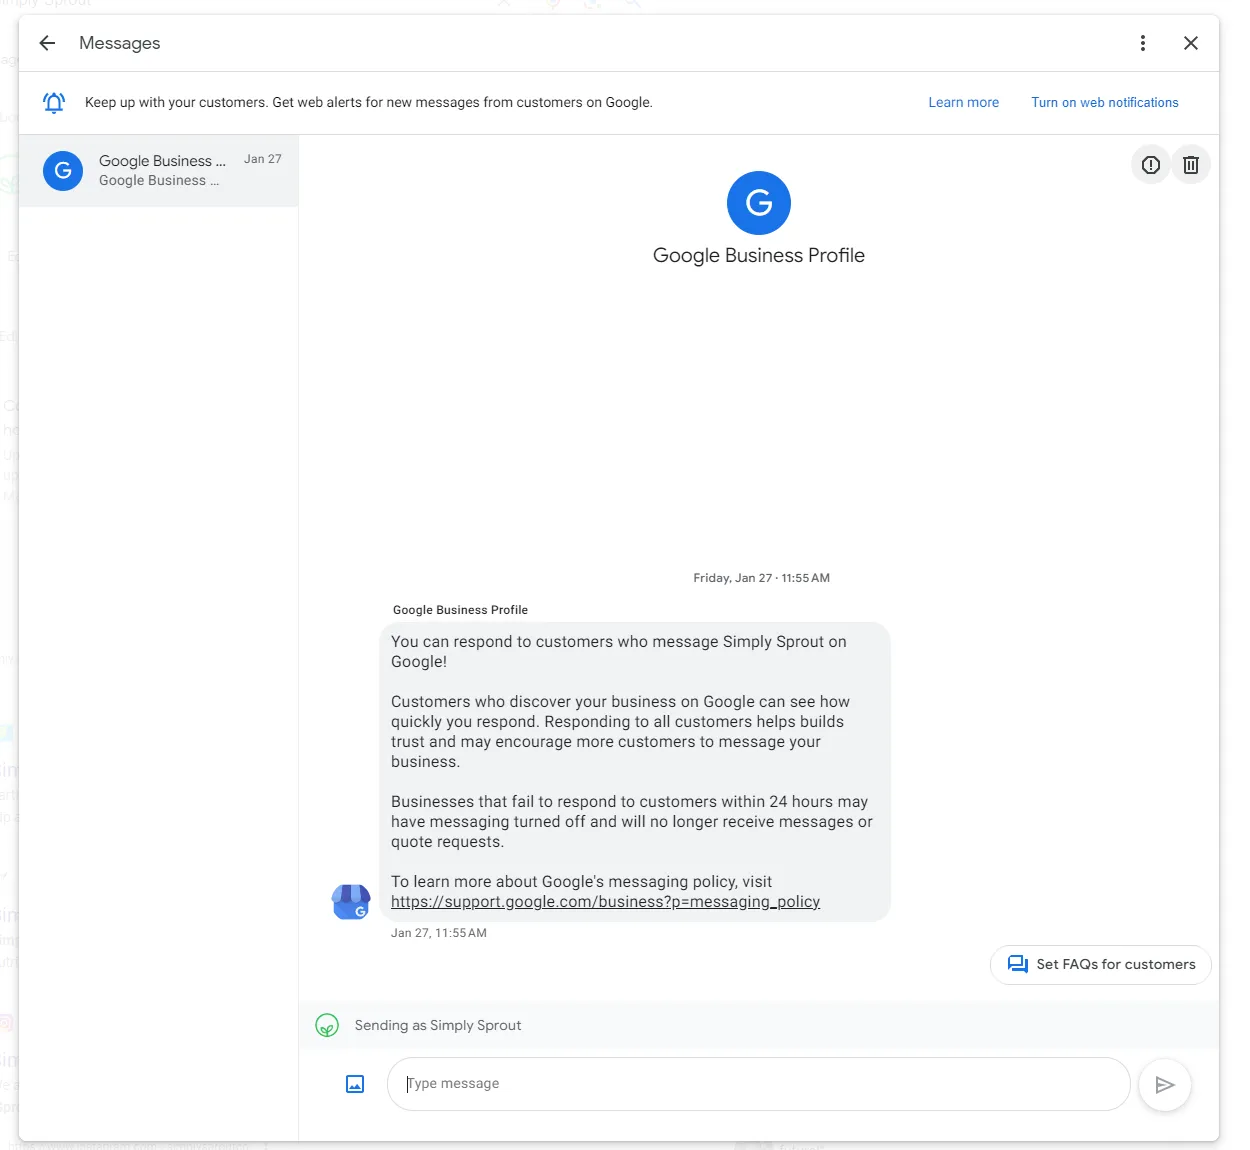
Step #11: Enable Messaging
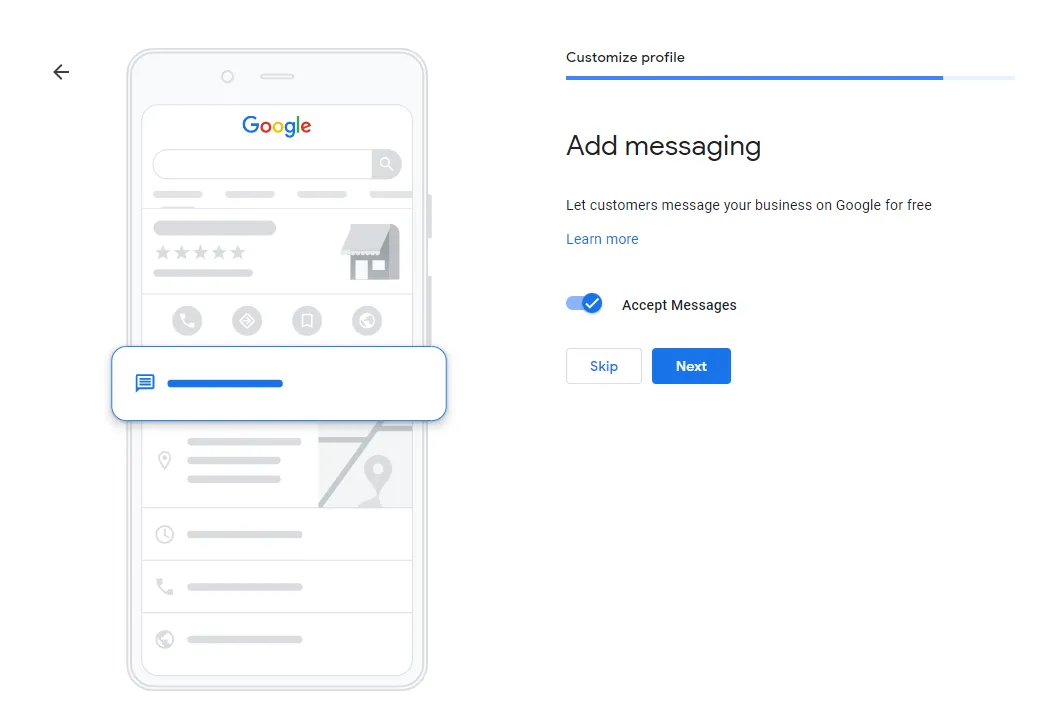
Decide if you would like to enable messaging. When you enable messaging customers can reach out directly to you with the chat feature. Customers often find a chat option less of an obstacle than calling. It can be a quick option to answer questions!
It is important to note that you should only turn on this feature if you plan on answering questions in a timely manner. In some instances if you don’t answer questions in a timely manner Google will turn this feature off. The image below shows what the user interface looks like where you can respond to chat requests.
Step #12: Add Your Business Description
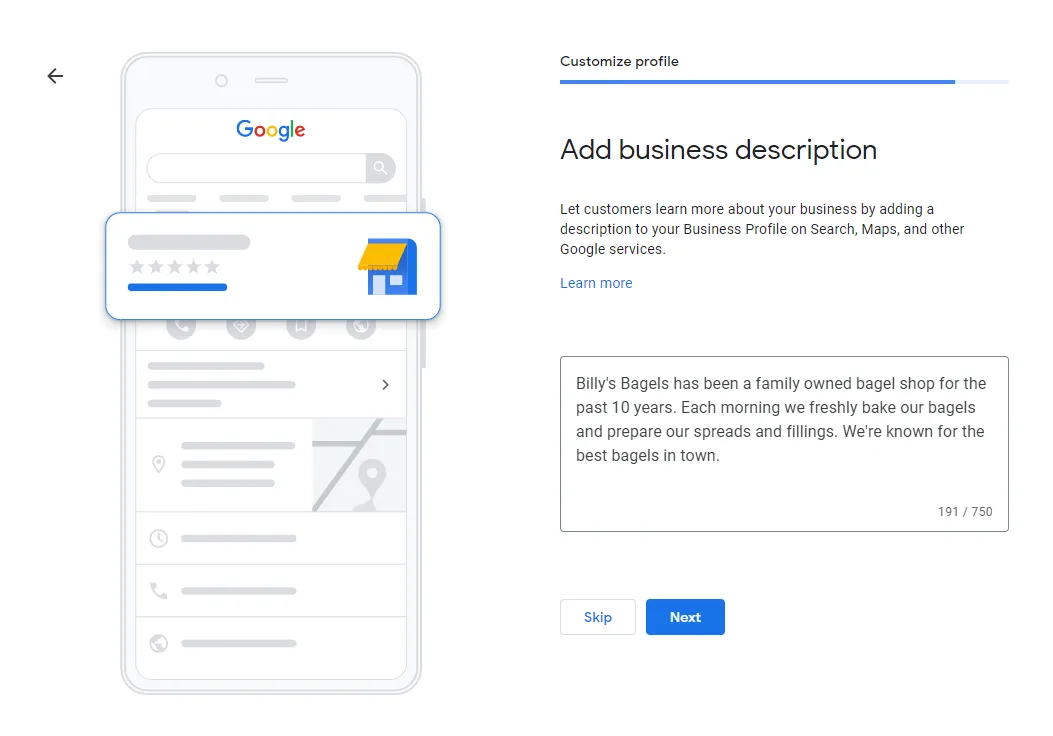
Write a quick description about your business. Be sure to capture what it is you do and what makes your business special.
Step #13: Add Photos Of Your Business
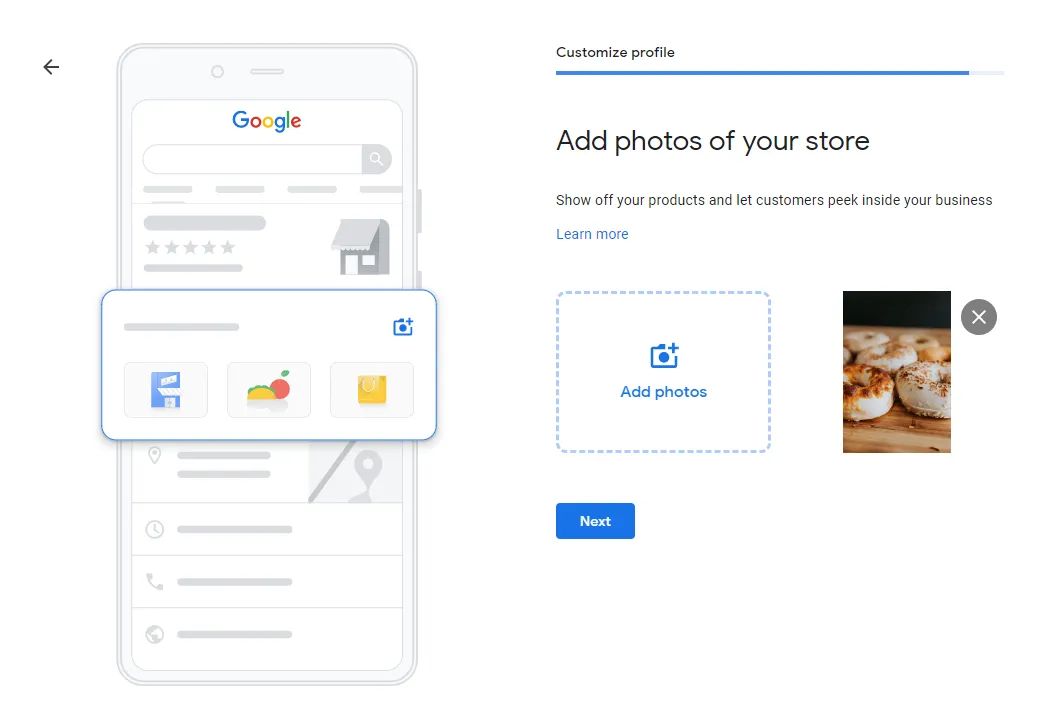
Take the time to compile a list of photos that capture your business. Here is a list of photos that you can add: - Exterior photos: Exterior photos help customers recognize your business as they approach from different directions. - Interior photos: Interior photos help your customers get a feel for the ambiance and decor of your business.
- Product photos: Great photos of representative or popular products give customers a better understanding of the kinds of goods you offer. - Photos at work: Photos help customers quickly understand the type of work you do. - Team photos: Team photos are important to present a more personal side of your establishment.
Important Note: Google will remove the following list of images if uploaded: screenshots, stock photos, GIFs, other manually created imagery, or imagery taken by other parties.
Step #14: Skip Or Claim Advertising Credit
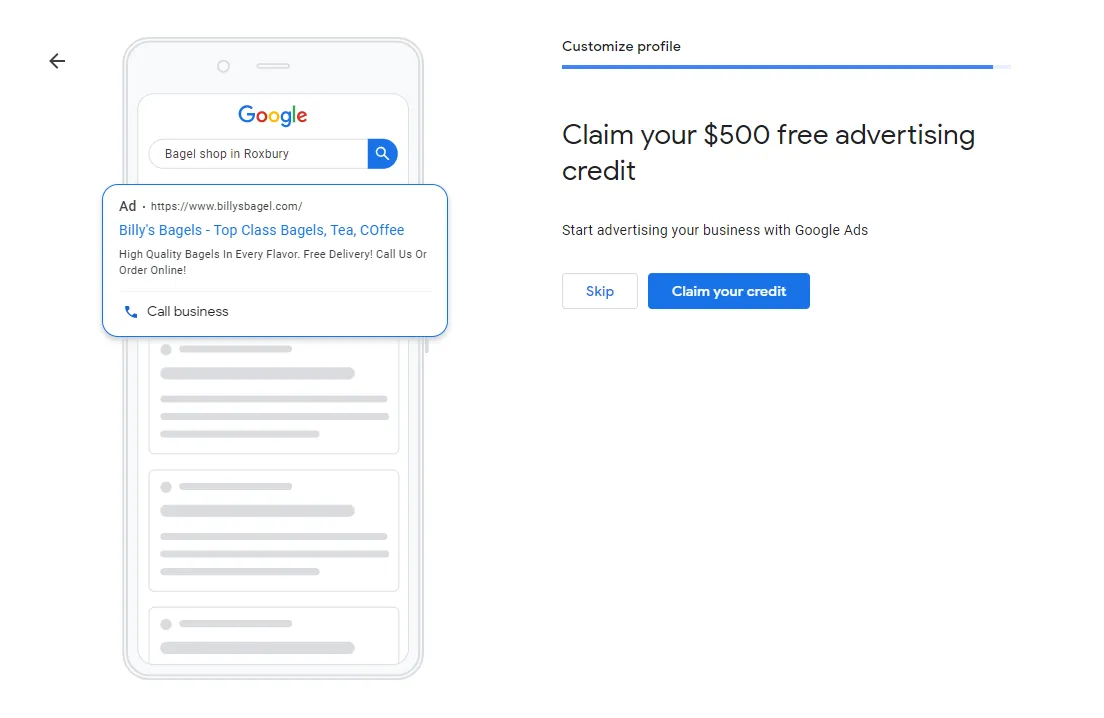
Google will ask you if you would like to claim your $500 credit to spend on their advertising platform. If you are ready to run ads for your business on Google then select “Claim your credit”. If not, don’t worry. Google will offer plenty of opportunities in the future to claim advertising credit.
Next Steps
Congratulations on completing this walkthrough! You should now have a published Google Business Profile for your business. Remember to verify your ownership, otherwise your profile won’t be published to the public.
Make sure to update this profile as your business evolves. Your business hours may change or you may have taken a great photo of your team working. Either way, make those updates on your profile to let your customers know!
If you really want to make your profile pop then ask past customers to leave your a review!
Request Your Website Review!
Request your FREE website review and receive a custom 15 minute long video detailing actionable steps you can take to improve your website. Your first step to more visibility, customers, and time.
Request My FREE Website Review